Showing posts with label how to. Show all posts

Tuesday, 1 August 2017

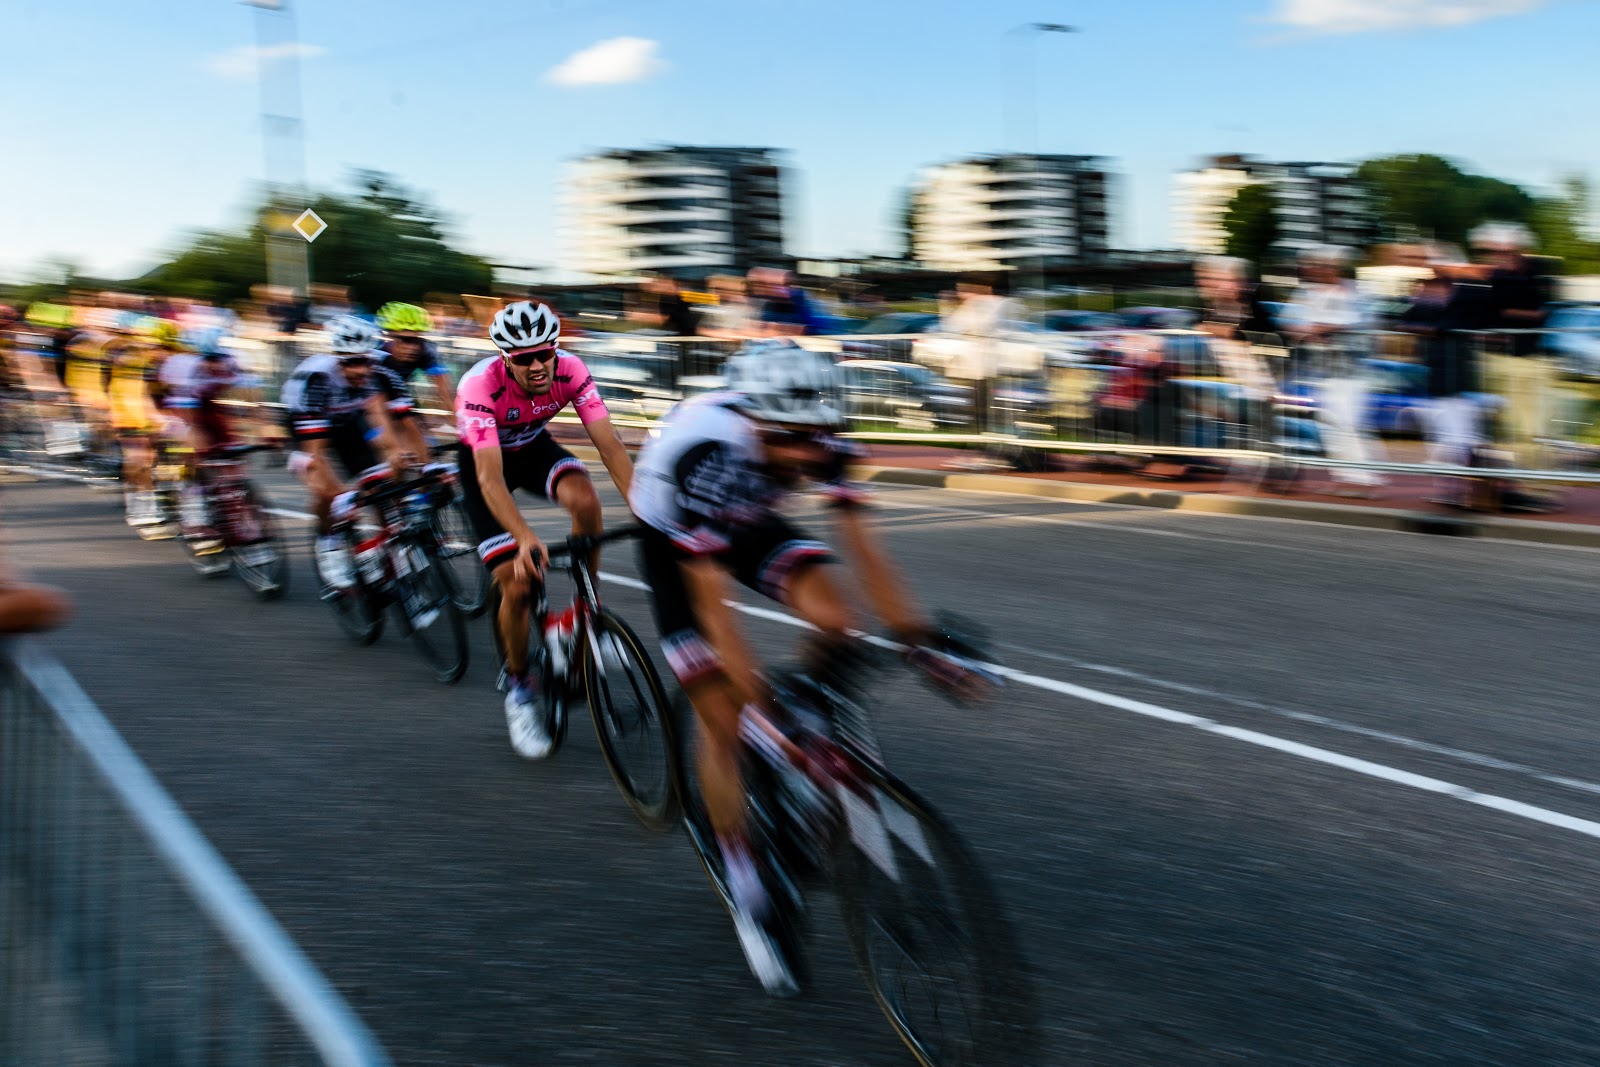
pro cycling photography


  I am Claes Touber a Dutch Photographer. My photography spreads from landscape photography, macro photography to wildlife photography. 


These forms of photography give me more opportunities to capture emotions that will for fill me. Every day there is a new opportunity and a new adventure waiting to capture. 

My work can be found and bought on:
photoblog society6 redbubble portfolio werk aan de muur 500px prime fine art america

For more information contact me at: claestouber@yahoo.com

Support me so i can keep taking photographs and upload them to the blog:


Tuesday, 25 October 2016

dressing for cold weather.

it is fall in most of the world, sorry australia. And thus every day the temps go down. Now you need to be prepared for this weather. What could you do?

First you need to be able to move freely to keep photographing. So  big woolly fur coat is not the solution to be warm. What i do is: i dress in layers.


  1. t-shirt ( a thin shirt will make life so much easier)
  2. sweatshirt (warm)
  3. hoody ( warm fluffy and easy to take off)
  4. wind coat ( when it rains and is windy you will thank me)
  5. scarf ( a thin one so your neck can still move)
  6. gloves ( i use sporting gloves)
And if it's really cold i wear under my pant a pair of stretch pants. And remember if it get warmer you can take one layer of. here below are some photographs i have taken in a nice warm coating. 

black headed gull, winter plumage

black crow

eurasian jay
 
grey heron


I am Claes Touber a Dutch Photographer. My photography spreads from landscape photography to wildlife photography. 

These forms of photography give me more opportunities to capture emotions that will for fill me. Every day there is a new opportunity and a new adventure waiting to capture. 

My work can be found and bought on:
photoblog society6 redbubble portfolio werk aan de muur 500px prime fine art america

For more information contact me at: claestouber@yahoo.com

Support me so i can keep taking photographs and upload them to the blog:

Tuesday, 20 September 2016

best focal length for macrophotography

tamron 180mm 1:1 macro

Best focal length for macro?

Macro photography is a unique form of photography that has a dedicated lens. You might say the 70-200mm is a dedicated portrait lens but is not just for portrait designed. so you want to get into macro photography just buy a macro lens. It's not that simple. 

just as any form of photography there are more than one way to get the shot. Like using a lens with extension tubes, or a dedicated macro or even a wide angle lens. 

macro on a wide angle lens
I like to switch from lens to lens when shooting macro. For some images a wide angle lens will work great. It works great making small things look huge in the world. 

Using a long telephoto lens with a teleconverter of extension tubes works good if you have a bigger subject. When you use a teleconverter on a lens the focus distance does not change, just the framing does change. Extension tubes reduces the focus distance. 


sigma 150-600mm at 600mm slight crop
Its just the question: what are you photographing and what is the best lens to use. When photographing animals that could bite and do serious damage i like to use a telephoto lens with a teleconverter. And when photographing a dragonfly or plants i will use a wide angle lens or dedicated macro lens. 

I am Claes Touber a Dutch Photographer. My photography spreads from landscape photography to wildlife photography. 

These forms of photography give me more opportunities to capture emotions that will for fill me. Every day there is a new opportunity and a new adventure waiting to capture. 

My work can be found and bought on:
photoblog society6 redbubble portfolio werk aan de muur 500px prime fine art america

For more information contact me at: claestouber@yahoo.com

Support me so i can keep taking photographs and upload them to the blog:


Friday, 12 August 2016

Why you need sky detail in a bird in flight photograph!

Photographing birds in flight is not an easy task. You first need to find the bird and hoping it is flying. Then you need to aim you big lens. And the most difficult thing is: what should my exposure be.

In my opinion you always should shoot for retaining detail in the sky. Sometimes you need a clear background in a shot but that should be a blue background. White does not gives the bird full potential.
 My Tips for getting better sky is a bird in flight photograph:

  • underexpose the bird by 1/3 to 2/3 of a stop.
  • shoot in light that's not to bright.
    • early in the morning/evening.
  • always point your shadow to the bird.
    • this means the bird and the sky are being lit by the same light source. 

If you liked this blog-post please share this onto your Facebook page or on twitter.

I am Claes Touber a Dutch Photographer. My photography spreads from landscape photography to wildlife photography. 

These forms of photography give me more opportunities to capture emotions that will for fill me. Every day there is a new opportunity and a new adventure waiting to capture. 

My work can be found and bought on:
photoblog society6 redbubble portfolio werk aan de muur 500px prime fine art america

For more information contact me at: claestouber@yahoo.com

Support me so i can keep taking photographs and upload them to the blog:
http://claes-touber.deviantart.com/?givepoints

Friday, 5 August 2016

Bad weather, how to cope with it!

This last week i had a few days with bad weather, cold rain and only heavy clouded. In that weather creating a good photograph is difficult, not impossible though. You just have to look in the right places. 
When you photograph landscapes rain clouds can be a blessing, having a dramatic sky over a mediocre landscape can make a beautiful image. But still you need to be outside to create that photograph, going outside when the weather is bad that is the difficult part.

Getting yourself to go out in bad weather.

When it is raining, grey skies and cold it is understandable that you rater stay inside with a cup of tea and a Top Gear Special. And i think getting a pattern of going out to shoot. When you go everyday you get used to it. My tip is start when you have a day with nice weather and get the shots you want, when you have done that and there is a day when the weather is bad you know the area. After you get accustomed to going outside in nice weather and mediocre weather its no big deal to go out in bad weather because you know where to hide if it happens to be downpouring. and remember when you go outside to shoot and the weather is bad dress for the weather. 
HAVING PROPER CLOTHING IS AS IMPORTANT AS MOTIVATION AND PATTERN.

My recommendation is to get these clothing:

  • hiking shoes
  • hiking socks ( cary extra in your bag in case of wet feet)
  • strong flexible pants
  • t-shirt
  • sweater
  • rain coth
  • long sleeve (in case of extra cold weather, keep one in your bag)
  • gloves (handy when its snowing, also when there is a lot of wind)
  • hat (keep the sun out of your eyes)
  • sunblock
  • insect spray
It might look like pointless investments but having these to wear gives extra confidence to photograph out and about in nature.


If you liked this blog-post please share this onto your Facebook page or on twitter.

I am Claes Touber a Dutch Photographer. My photography spreads from landscape photography to wildlife photography. 

These forms of photography give me more opportunities to capture emotions that will for fill me. Every day there is a new opportunity and a new adventure waiting to capture. 

My work can be found and bought on:
photoblog society6 redbubble portfolio werk aan de muur 500px prime fine art america

For more information contact me at: claestouber@yahoo.com

Support me so i can keep taking photographs and upload them to the blog:
http://claes-touber.deviantart.com/?givepoints
 

Tuesday, 12 July 2016

How to find the bird

Finding birds in the wild is not like tv shows. You search and search for days and you might see the bird for a fraction of a second and then it's gone. Neither it is like the hot new app pokemon go. There is no live map letting you know were a bird is. But how do you find them then? Well you research the bird until you know enough to research the likely areas they might live.

Dont worry i have tips!

A common buzzard in flight, looking for a snack.

I have been a animal enthusiast since i was child and gained a lot of knowledge through books and documentaries. This is one way, not the only way. Here are my tips:

  • don't go out not knowing what you want to photograph.
  • buy a birding field guide
  • Ask other what they have found in the area you want to photograph in. 
 These three tips need some explaining. The first tip is a mindset tip, when you know what you want to photograph you will focus on that. Meaning if you see a buzzard you think in a way of: i want to photograph of the buzzard in flight. You force yourself to look up in the sky where they might (you guessed it) fly. 

A birding guide. Books and apps that have a written description of birds and drawings/photos. These books are essential if you want to prepare to photograph a bird. These books have information in what kind of habitat they live. After that is a question of location scouting, were does this bird most likely live. 

Want to know more than a birding book/app can give you? ask someone whom photographs birds in the same area ass you. Every one knows something that you don't and visa versa. And by asking other people you might get to know more people to share your hobby with.      


If you liked this blog-post please share this onto your Facebook page or on twitter.

I am Claes Touber a Dutch Photographer. My photography spreads from landscape photography to wildlife photography. 

These forms of photography give me more opportunities to capture emotions that will for fill me. Every day there is a new opportunity and a new adventure waiting to capture. 

My work can be found and bought on:
photoblog society6 redbubble portfolio werk aan de muur 500px prime fine art america

For more information contact me at: claestouber@yahoo.com

Support me so i can keep taking photographs and upload them to the blog:
http://claes-touber.deviantart.com/?givepoints

Tuesday, 5 July 2016

Reflection photography

Common tern catching a fish.
the ripples in the water makes the reflection slightly blurred
 How hard is it to get a photograph of something in a reflection in the water? Very is the answer. This makes it just more rewarding to do. Especially when you combine it with an action shot.

There are a couple of things to keep in mind when photographing reflections in the water.

  1. still water or blurred water
  2. where is your light source
  3. Using a polarizer? 

1: Still water or blurred water.


What type of water do you need to get a certain shot. Still water makes a different reflection than a blurred water. When there is no wind at all the water is still this type of water makes a prefect reflection in your shot. Blurred water makes you reflection look like it is blurred/out of focus.  

a coot running over the water.
the a still as possible water keeps the reflection looking sharp.

2: where is your light source.


The lighting of your subject is the most important to get a good reflection. When you are shooting with the water and your subject being lit by the same light source there will be almost no reflection. Keeping light off the water is a difficult thing to do. When the sun is low (like sunset and sunrise) most of the light hits your subject instead of the water. In conjunction with the low angle of the light source you should keep your camera as low as possible. keeping it at eye level of you subject is the best thing to do. Not just for lighting but also for composition.

3: Using a polarizer?


What do polarizer do? they cut of glare from a shiny surface. So this is a artistic choice. It depends on what you want to capture in a photograph.

This were my tips on photographing reflections in water. I hope you find this useful.   

If you liked this blog-post please share this onto your Facebook page or on twitter.

I am Claes Touber a Dutch Photographer. My photography spreads from landscape photography to wildlife photography. 

These forms of photography give me more opportunities to capture emotions that will for fill me. Every day there is a new opportunity and a new adventure waiting to capture. 

My work can be found and bought on:
photoblog society6 redbubble portfolio werk aan de muur 500px prime fine art america

For more information contact me at: claestouber@yahoo.com

Support me so i can keep taking photographs and upload them to the blog:
http://claes-touber.deviantart.com/?givepoints


Tuesday, 28 June 2016

Birding in the city

Is it possible to watch birds in the city? yes it is possible. Birds are everywhere, your garden, the park, the docks, on the streets and even if there are no trees they are around. But you need to find them.

a male house sparrow,
Found on a fence a side of a construction place

How do you find birds in the city?

  • Step one look around you, on fenches and walls there are usually pigeons. 
  • Step two expect the unexpectable. 
    • just because you are surrounded by concrete walls doesn't mean birds are gone.
    • cities have parks, water streams, gardens they are hotspots for birds because there is food for the birds.
    • So birds you have never seen before can just be behind the little bush. 
  • Step three be confident.
    • Don't look shy when you try to find birds, people look weird at you because you act weird. 
    • Be proud of your knowledge of birds and that you can find them in places the other people cant find them.
    • If you get weird questions of people what you are doing just show them a picture of the bird you just took.

Is bird watching any different than in a nature area? no, its the same there are just more dogs and people around.


If you liked this blog-post please share this onto your Facebook page or on twitter.

I am Claes Touber a Dutch Photographer. My photography spreads from landscape photography to wildlife photography. 

These forms of photography give me more opportunities to capture emotions that will for fill me. Every day there is a new opportunity and a new adventure waiting to capture. 

My work can be found and bought on:
photoblog society6 redbubble portfolio werk aan de muur 500px prime fine art america

For more information contact me at: claestouber@yahoo.com

Support me so i can keep taking photographs and upload them to the blog:
http://claes-touber.deviantart.com/?givepoints

Friday, 10 June 2016

Getting great macro photos


Getting down low in important
Macro photography is an interesting form of photography. You can do it everywhere, in home, your garden, the street.

For example a wall, a wall has lines, indentations. In there you can find textures and insects. A recurring texture makes a great look for a photograph. Insects can be interesting because the color of the brick and the pattern of the bricks.


Top tips:

  • Get down low. When you are laying on the ground trying to photograph an insect you have more background options than if you are pointing your camera to the ground.
  • You don't need a macro lens to shoot macro. a 50mm lens can create great close up photographs. If you want to get closer but you don`t want to degrade your image quality: buy extension tubes. because the extension tubes dont add glass in front of behind your lens. And if you buy a real macro lens you can still use extension tubes. With the extension tubes you can get more than one to one magnification.
  • Use a flash. With a flash you add light to the scene. The flash can freeze fast movement or accentuate textures in you image. Another reason to use a flash is so you can shoot with a larger depth of field. The depth of field is a side effect of how big your aperture is. A large aperture results in to a small depth of field. Meaning less of your photo is infocus.  But in macro a small aperture has a small depth of field. So when you want more than a milimeter of your photo in focus you need an aperture of F/14. A F/14 aperture lets in a very small amount of light.
Let me know if you find these macro photography tips helpful. Let me see your images, I like to see other people's photos. It is inspiring, tag me in the picture on social media (@ClaesTouber on twitter and @claes_touber_photography on instagram) 


If you liked this blog-post please share this onto your Facebook page or on twitter.

I am Claes Touber a Dutch Photographer. My photography spreads from landscape photography to wildlife photography. 

These forms of photography give me more opportunities to capture emotions that will for fill me. Every day there is a new opportunity and a new adventure waiting to capture. 

My work can be found and bought on:
photoblog society6 redbubble portfolio werk aan de muur 500px prime fine art america

For more information contact me at: claestouber@yahoo.com

Support me so i can keep taking photographs and upload them to the blog:
http://claes-touber.deviantart.com/?givepoints

Tuesday, 26 April 2016

Should you photograph a birds nest? i don't think so.

The bird is focusing on me so i got to close, this means back up.

Simple answer to the question is: NO! you should not. But there are reasons why you can photograph the nest. If you photograph the nest There are some thing you can do to make it safe for the birds. only photograph nest that are in public areas where you are allowed to come, don't cross any fencing.

Reason to photograph a birds nest is to keep track of the nest, protect the nest or make a photographing story of the breeding bird. Never photograph the nest just for the sake of photographing a bird nest.

Guidelines for if you are photographing bird nest.
  • Keep your distance!

First thing is that you need to keep your distance. A general rule of thumb is. If the bird on the nest is not tracking your movement you are far enough away from the bird. Why you don't want to come close is that you can scare the bird. if the bird is scared it while either attack you or leave the nest.


    this white stork watched somebody so i creeped for ward. 
  • Don't place webcams after a bird makes it nest.
If you have a nest box in your garden and want to stream the process of a bird making a nest and breeding prepare the box. When a bird starts making a nest you should never interfere with it, this is because the bird might leave the nest, the eggs or chicks. When making the nest box you need to think: do i wanna stream from this nest? if that answer is yes, i want to show the world this beautiful process of breeding. Than you need to build in a webcam. Make sure that it is legal in your region if you want to stream from a bird nest box.

  • posting the location of the nest is a no no!
Sharing were the nest is is a very bad idee. Simply because other photographers might want to recreate the shot. If an inexperienced photographer tries it they might come to close to the nest of may even damage the nest. Keep the location for your self. 
The white storks are busy whit just there nest.
This means they didn't know/care i was there photographing
  • Camera setting for photographing a nest.
   As we have established we need to be far away from the nest. we need a long lens. Long lenzen have a small depth of field. This is something to consider. The best way is to get the whole nest in focus. with the birds eyes as focus point. So a small aperture is prefered. something like f/7.1 or F/9. Keep your shutter speed high enough to be able to hand hold. A tripod can do a lot of damage to the area. this means you need to boost your iso. If you want to be able to print the images keep your iso between 100 and 400. higher iso's are still usable for web use.


So now you know what to keep in mind when you decide you do need that photograph of a bird nest.
If you photograph bird nest is at your own risk. You decide to photograph them so you are responsible.

Goose are very strong birds so don't upset them.


If you liked this blog-post please share this onto your Facebook page or on twitter.

I am Claes Touber a Dutch Photographer. My photography spreads from landscape photography to wildlife photography. 

These forms of photography give me more opportunities to capture emotions that will for fill me. Every day there is a new opportunity and a new adventure waiting to capture. 

My work can be found and bought on:
photoblog society6 redbubble portfolio werk aan de muur 500px prime fine art america

For more information contact me at: claestouber@yahoo.com

Support me so i can keep taking photographs and upload them to the blog:


Tuesday, 19 April 2016

how to photograph birds in action.


Photographing birds is an amazing way to use your camera to the max. Because birds are not the most predictable subject to photograph it is very challenging.

preparation is key.


to photograph birds you must know how birds react an move trough nature. Location is the first big hurdle. photographing a flying bird over an empty field is much easier than a bird in a forest. Also different birds live in these locations. Big buzzards usually  fly around open fields and a great spotted woodpecker in the woods. 

autofocus.

when photographing in the woods you can adjust your auto-focus settings on your camera to make it easier. I use a Nikon d7200 as my main body. this body has the ability to use multiple focus point to set focus. If your background in cluttered whit trees, branches and open spots of sky I would choose the smallest group focusing mode. So you have all the points on the bird it self and not on the background. In an open field the background is the sky so your camera has less problems in figuring out what should be in focus. In such a situation you can us the 3d tracking focusing mode of your camera. If you know before hand in what location you will be in, you could have set up your camera so you wont mist the bird.

back button focusing is (in my opinion) the way to go. In this mode you delink the shutter, exposure lock and de autofocus. the button on the back op your camera (check the manual of your camera on how to turn in on) can be set as focusing button. When you use this button to focus your camera can still change the exposure of your shot. by holding the button pressed in your the focusing system in your camera will track the bird as it flies through the sky.  

What bird?

In order to select your lens it`s handy to know what bird you want to photograph. If you only have one telephoto lens this is a easy choose. Because birds are there in all different sizes you can photograph some of them with a 300mm lens and an other bird at the same distance might be very small in frame. For example you want to photograph a great tit. this is a small bird but you can get close to them. So you can use a 400mm lens if you set up in your garden. Birds in your garden are more used to humans so they will come closer, especially when you have some food in the garden. 
The deeper you go into nature the birds get more nervous of humans. The 150-600mm lenses of tamron and sigma are good lenses to have when you cant get close to a bird but you are on a budget. the Primes of canon and nikon are always good but they are very expansive. 

Time of day.

When are you going to photograph the bird. As a photographer we know that sunrise and sunset the light has a very nice colour. Right around these times birds are the most active. But this also has some cons. like: low light, slow lenses (a f/6.3 let in less light than a f/4 or f/2.8), early getting out of bed and not all birds are active at the same time. This is the moment you need to know what kind of bird you want to photograph. Because a barn owl hunt at night when there is no light and a short eared owl hunt in the day time.

Shutter speed.

a high shutter speed is needed to photograph birds in flight. For large birds with a slow wing movement a 1/1000 should be enough. But small birds like kingfishers are fast moving birds so a 1/2000sec is a minimum. Compensating with a higher ISO is the best ting to do.  For birds that are sitting on a branch you can use a slower shutter speed to get an as clean as possible shot (lower iso).
even though you have a fast shutter speed a tripod can be a great too to get better shots. This is because the lenses are heavy. and with a gimbal head you don't worry about the weight of the lens while you are aiming to get the bird in your frame.  

Weather.

 Selecting in what weather you go out to photograph is important. Simply because a soft light in a bird photograph means there is no feather detail no matter how sharp your lens is. To get sharp images you must have direct light on the bird. This can be done by using a flash. Or by choosing the position from were you photograph. the best way is to have the sun in your back and your shadow pointing towards the bird. By this way to can be sure the face is lit by the light and you need to to les post proces (boosting the shadows). 


Most importent this is to have fun and respect the birds. Never scare a bird so it leaves the nest.  

fighting coots

flying coots

earasian coot

If you liked this blog-post please share this onto your Facebook page or on twitter.

I am Claes Touber a Dutch Photographer. My photography spreads from landscape photography to wildlife photography. 

These forms of photography give me more opportunities to capture emotions that will for fill me. Every day there is a new opportunity and a new adventure waiting to capture. 

My work can be found and bought on:
photoblog society6 redbubble portfolio werk aan de muur 500px prime fine art america

For more information contact me at: claestouber@yahoo.com

Support me so i can keep taking photographs and upload them to the blog: